S3 bucket → corp-mktg → email → [university]
Amazon Web Services (AWS)
s3 Bucket
Amazon S3 or Amazon Simple Storage Service is a service offered by Amazon Web Services that provides object storage through a web service interface.
For our team’s purposes, the Amazon s3 bucket is simply a place to store PDFs. Once those images and PDFs have been uploaded, we can get links to those files and use them on our websites.
Quick Links
How Do I Upload a New PDF to the s3 Bucket?
At a Glance…
Step by Step Guide
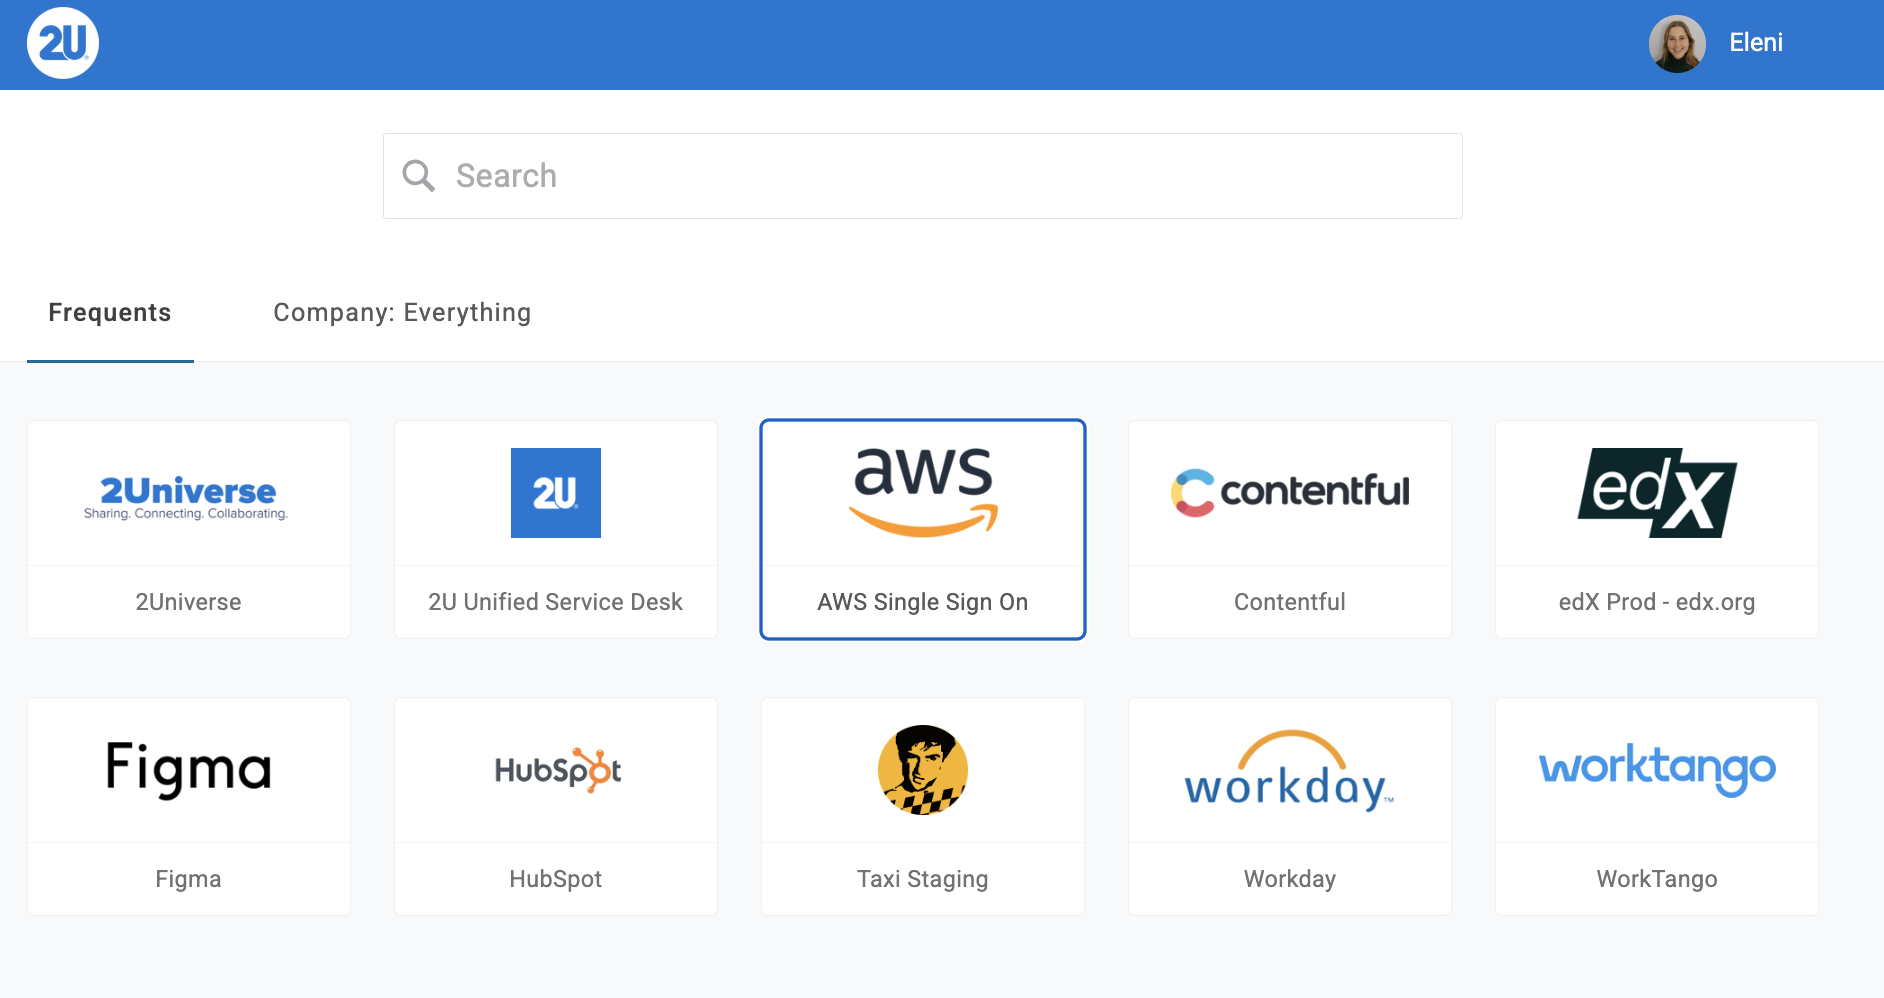
Step 1: To login to the Amazon s3 bucket, first go to OneLogin and search for AWS Single Sign ON
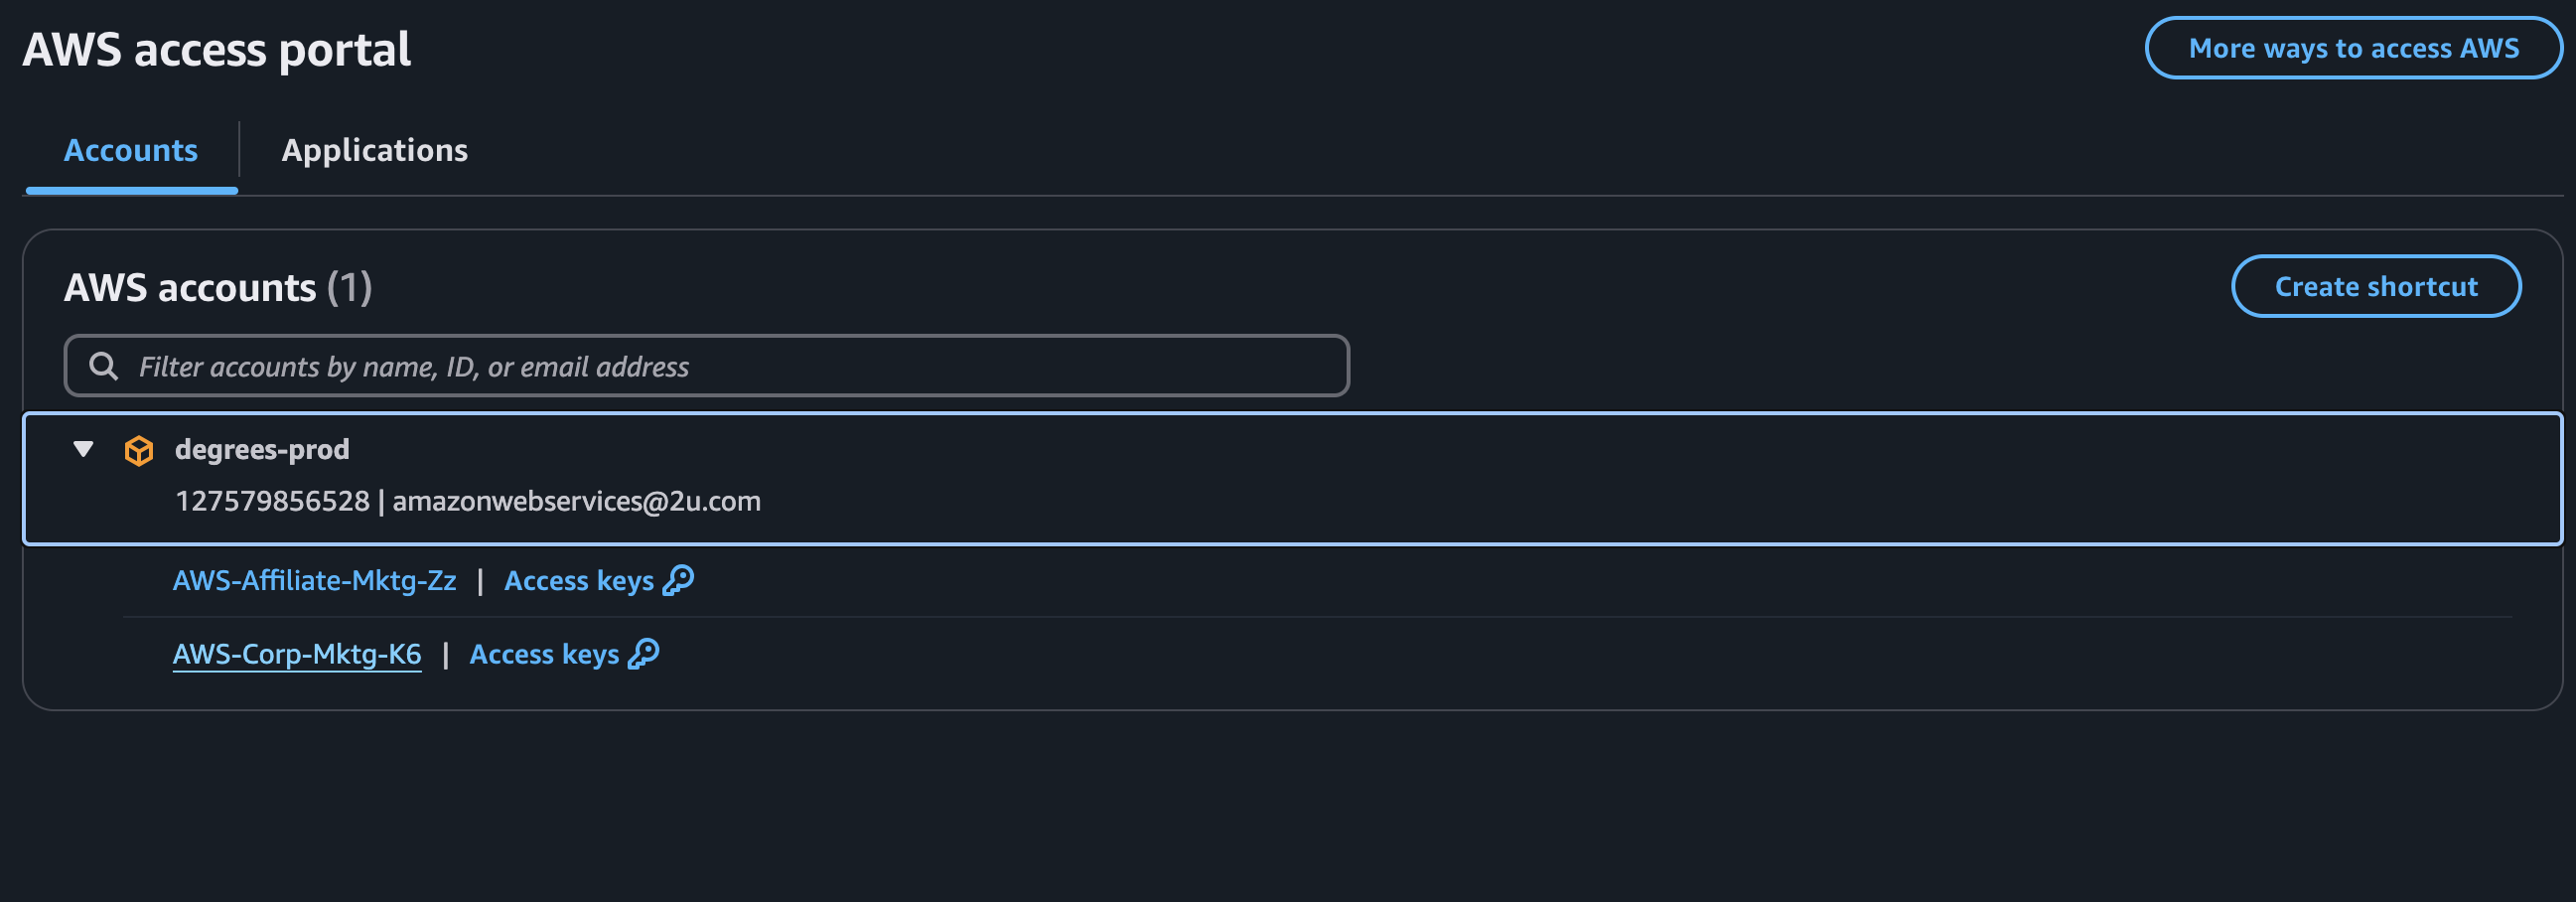
Step 2: After clicking on this icon, you will be taken to a page titled “AWS access portal” You will then want to click on the “degrees-prod” dropdown, then select AWS-Corp-Mtkg-K6
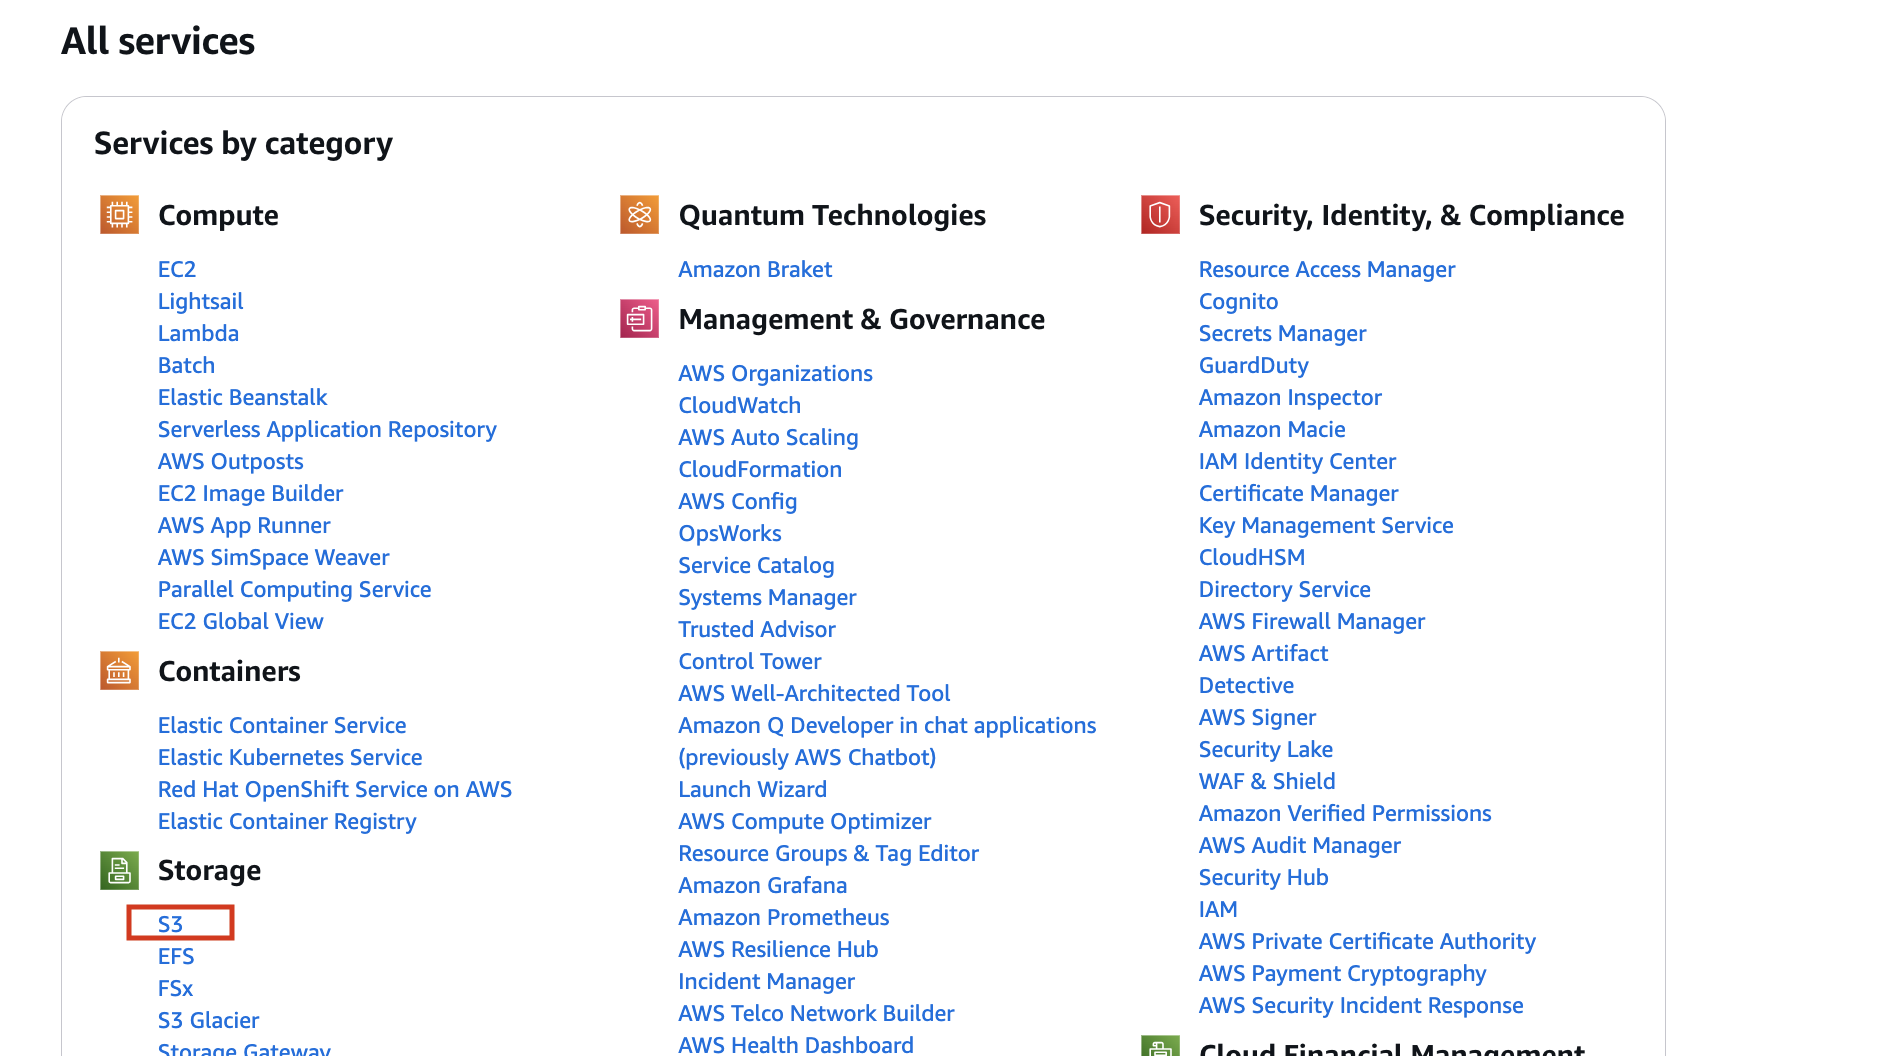
Step 3: After clicking on this, you will be taken to a page titled “Console Home” You can either select s3 from the “Recently visited” dashboard if that available or going to All services and finding s3.
Step 4: From here, you can navigate to the correct buckets. Navigate to “corp-mktg” bucket, then “email” bucket, and then type in your program abbreviation name to find its folder. Once within the program folder,, you can go ahead and click upload.
Note: Please make your file name as evergreen as possible by removing all internal language(like the Jira ticket number), dates, and other unnecessary information.

Step 4: When you click upload, you’ll be taken to this screen. You can either click “Add File” or drag and drop a file from your desktop.

Step 5: Once you’ve selected your file, click “Upload” again.

Step 6: You will then be taken to this page, where you will want to click on the title of your file in blue.

Step 7: This will take you to another page, where you can now copy the “Object URL” of your file and send it to the appropriate stakeholder or upload to the desired location within wordpress.
How to Replace an Existing Link for a PDF
- Download the updated PDF and save it to your desktop
- Rename the updated PDF to match the name of the existing PDF
- Be careful to make sure they match exactly
- If the PDF name you are replacing has “+” sign in it, you need to replace that with a space in the new PDF title before uploading
- Note: If any other symbols/spaces are included this will impact the URL. Click here to reference all the symbols and their HTML unicode.
- Upload the updated PDF to AWS
- Ensure you’re navigating to the same buckets the existing PDF used
- If you are ever unsure, you can look to the live PDF’s URL structure
- Click on the original URL provided. You should now see the updated PDF has replaced the prior one